Microsoft Entra ID Connector Configuration Guide for ASCERA
Introduction
The Microsoft Entra ID connector allows ASCERA to authenticate to your tenant and retrieve identity data via Microsoft Graph APIs. Setup involves registering an application, generating credentials, and assigning the required permissions.
Prerequisites
- Application Administrator or Global Administrator role in the Microsoft Entra ID tenant
- Access to the Azure Portal
- Ability to grant Admin Consent for Microsoft Graph permissions
The following values are required when configuring the connector in ASCERA:
- Tenant ID
- Client ID
- Client Secret
Microsoft Entra ID Setup
Before you begin: As you work through the steps below, record the Tenant ID, Application (client) ID, and Client Secret values in a secure location. You will need all three to complete the connector configuration in ASCERA.
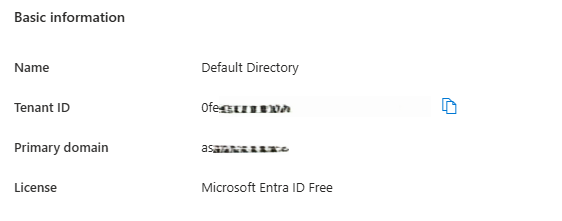
Gather Your Tenant ID
Navigate to Microsoft Entra ID > Overview and copy the Tenant ID.
If you manage multiple directories, confirm you are in the correct tenant before proceeding.
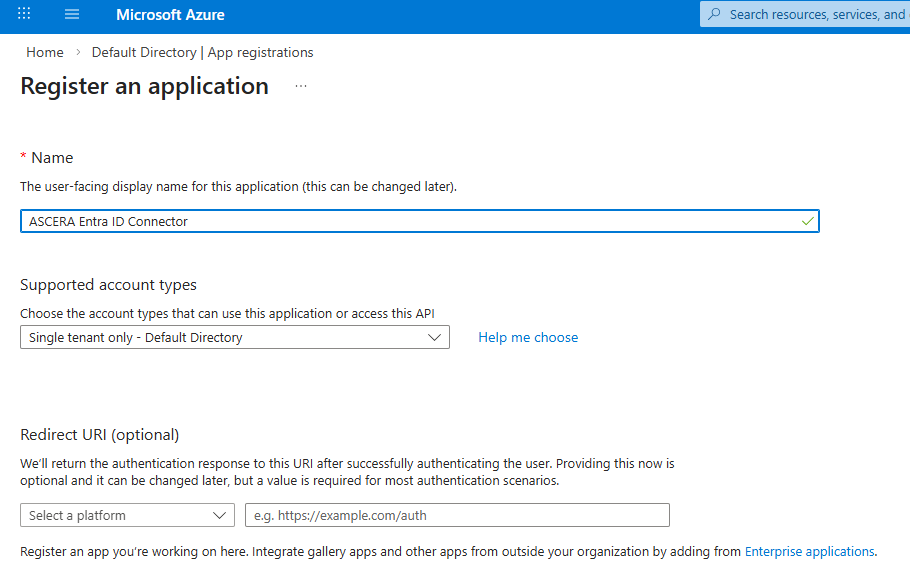
Register an Application
Go to Microsoft Entra ID > App registrations and click New registration.
- Name:
ASCERA Entra ID Connector - Supported account types:
Accounts in this organizational directory only (Single tenant)- This is usually the setting, but maybe different if your organization has specific requirements. - Redirect URI: Leave blank
Click Register at the bottom left of the page, then copy the Application (client) ID — this is your Client ID in ASCERA.

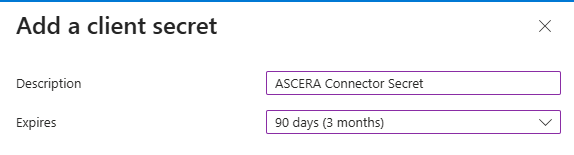
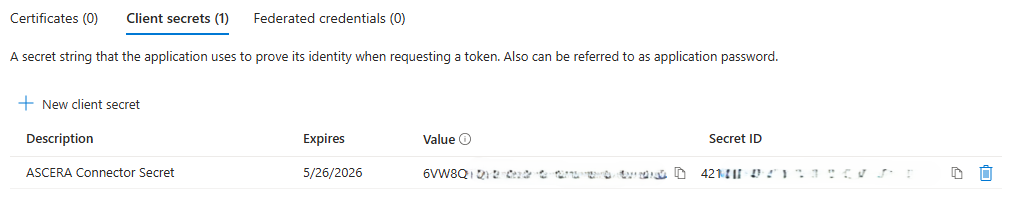
Create a Client Secret
In the app registration, within Manage click Certificates & secrets and then click New client secret.
- Description:
ASCERA Connector Secret - Expiration: Per your organization's security policy
Click Add at the bottom and immediately copy the Value — this is your Client Secret in ASCERA.
The secret value is only shown once. If lost, a new secret must be created.
Configure API Permissions
In the app registration, also within Manage, go to API permissions > Add a permission > Microsoft Graph > Application permissions and add:
User.Read.AllGroup.Read.AllDirectory.Read.All
Then click Grant admin consent for <Tenant Name> and confirm.
Without admin consent, ASCERA cannot retrieve Entra ID data. Permissions required may vary depending on which ASCERA features are enabled.

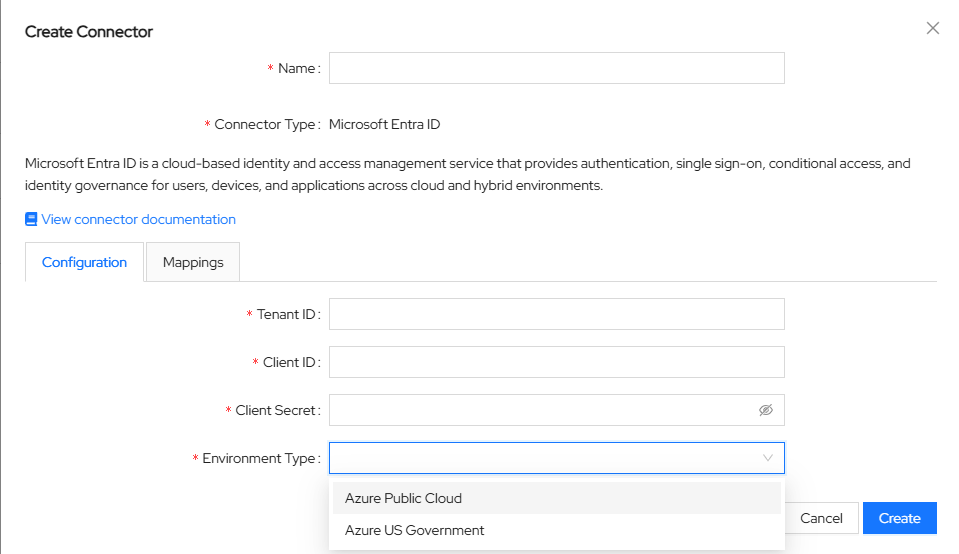
Configure the Connector in ASCERA
Unfold ConMon: Maintain and choose Connectors, then click Create in the upper left corner. Select Microsoft Entra ID from the list of connector types.
A pop-up form will appear requesting the Tenant ID, Client ID, and Client Secret collected in the previous steps.
Enter the values collected above into the connector configuration:
- Name:
Microsoft Entra ID ASCERA Connector(or any name you prefer) - Tenant ID:
<Your Tenant ID> - Client ID:
<Application (client) ID> - Client Secret:
<Client Secret Value> - Environment Type:
Azure Public CloudorAzure US Governmentdepending on your tenant type.
Save the configuration to proceed.
Test the Connection
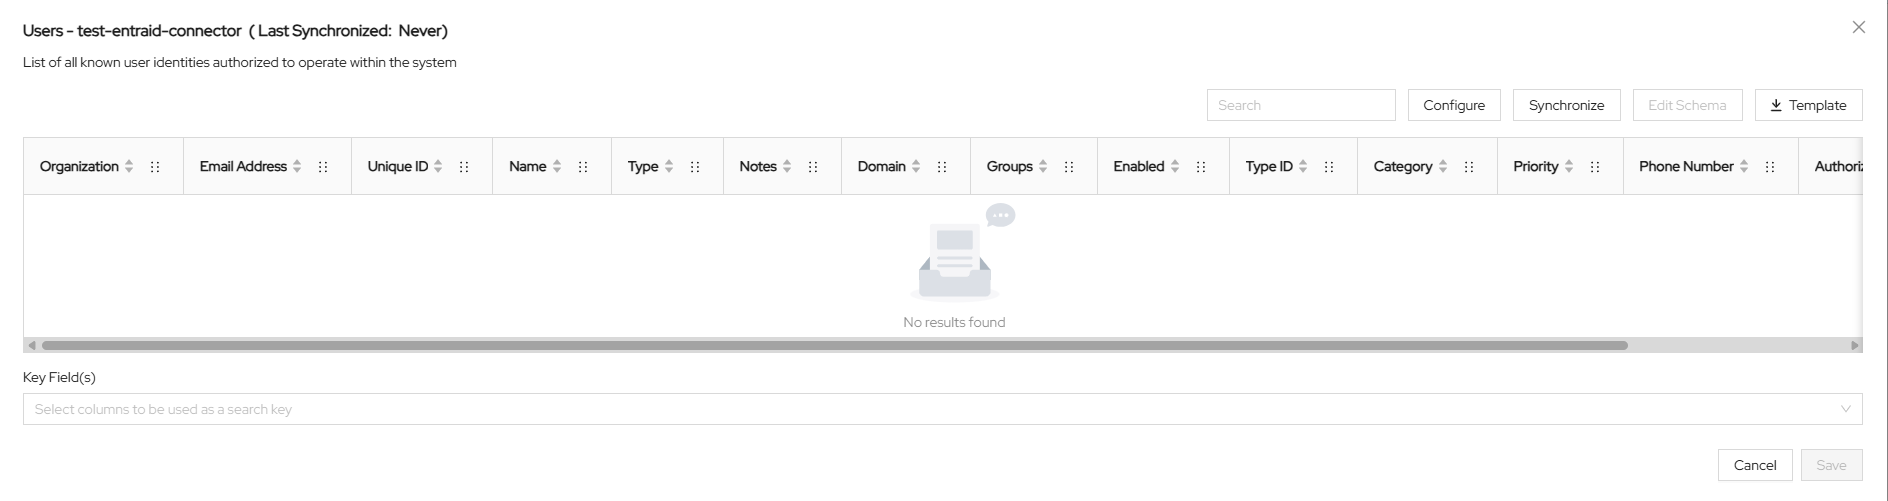
After saving, ASCERA automatically creates a Lookup List named Users - <connector name>. To test the synchronization, unfold Lists on the left and choose Lookup Lists. Open your Lookup List, click Synchronize, and confirm that the sync starts and completes successfully.
Troubleshooting
- Invalid client secret — Ensure the secret value (not the ID) was copied before leaving the page
- Insufficient permissions — Verify all required API permissions are added and admin consent has been granted
- Wrong tenant — Confirm the Tenant ID matches the directory where the app registration was created